Ice Luminaries
 |
 |
A frozen luminary can brighten a grave site as well as a sidewalk or path.
If you can freeze water, you are over halfway there.
Water food coloring (if you want colored water)
Sand or dirt
Two containers you can freeze water in (a 5 gallon plastic pail and a 2 liter pop bottle work wonderfully, but anything will work as long as one container is larger and both can be filled with sand or dirt)
Scotch tape / clear tape Duct or masking tape
Scissors
Pillar type of candle
Styrofoam (if displaying luminary on water)
Boat Anchor or heavy object with rope (if displaying luminary on water)
Step 1:
Small Container First
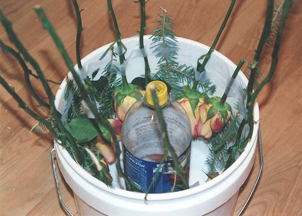
1. Cut the top off of a pop bottle at the neck
2. Fill the pop bottle with sand or dirt
Step 2:
Fill With Flowers, Toys, etc.
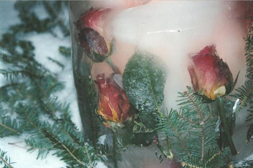
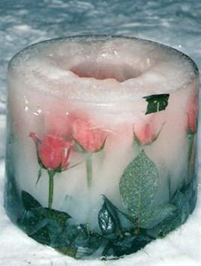
1. Add flowers, greens, toys, etc. to the 5 gallon pail.
2. You may wish to tape them to the bottom and side of the pail with a small amount of scotch tape. Items that are loose in the pail will float to the top of the water (which then becomes the bottom when the luminary is dumped out).
3. Make sure the flowers, etc. face toward the outside of the container.
4. Flowers are easier to handle if you leave some of the stem. In the case of roses you may want to leave the stems pointing out of the container and clip them off after freezing.
5. Most flowers and foliage freeze beautifully so don't limit yourself.
6. Luminaries that have nothing in them are also very beautiful.
Step 3:
Add Water and Freeze
1. Mix food coloring with water (optional).
2. Place the bottle with sand in the center of the pail.
3. Run some duct tape from one side of the pail over the bottle and to the other side of the pail. This will help to hold the bottle in place.
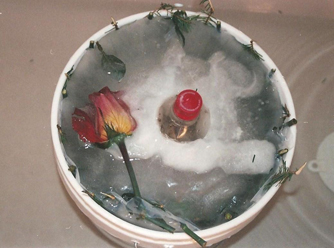
4. Fill the container with water, making sure not to cover the pop bottle entirely. Leave at least 1 inch of head room as water expands when it freezes.
5. Place your container in a freezer or, if you are lucky enough to live where it's cold, put it outside to freeze. Freezing outside will give you clearer ice. If it's below zero outside however, you will need to check frequently to prevent fast freezing that causes cracks.
Step 4:
Unmold the Luminary
1. When the ice is completely frozen, bring the container to your kitchen sink.
2. Start by removing the duct tape from the pail.
3. Dump out the sand.
4. Fill the now empty pop bottle with hot water.
5. Pull out the pop bottle.
6. Run warm water over the outside container until it slips off, leaving behind glistening flowers, or toys in the ice.
Step 6:
Refreezing
1. You can place your luminary back in the freezer until needed.
2. To prevent the luminary from sticking to other items in your freezer place it on a cookie sheet lined with waxed paper.
3. Peel off waxed paper when ready to use.
Step 7:
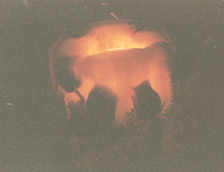
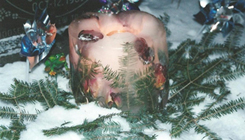
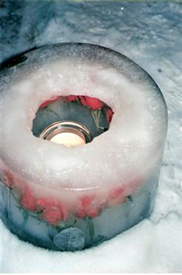
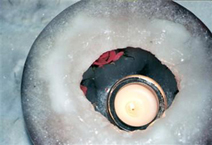
Placing Luminaries on Land
1. Consider the fire conditions.
2. When placing your luminary outside, consider laying down a layer of greens first. Set you luminary on the greens and add pillar candle that is in a clear plastic container inside the ice.
3. Light and enjoy for many hours.
 |
 |
 |
Step 8:
Placing luminaries on a lake or other body of water
1. Purchase a sheet of styrofoam.
2. Tie a boat anchor or other heavy object to the styrofoam.
3. Place greens on the styrofoam.
4. Place the finished luminary on the styrofoam.
5. Insert a pillar candle that is in a clear plastic container.
6. Light and enjoy for many hours.
7. Be sure to clean up the styrofoam after luminary has melted.

